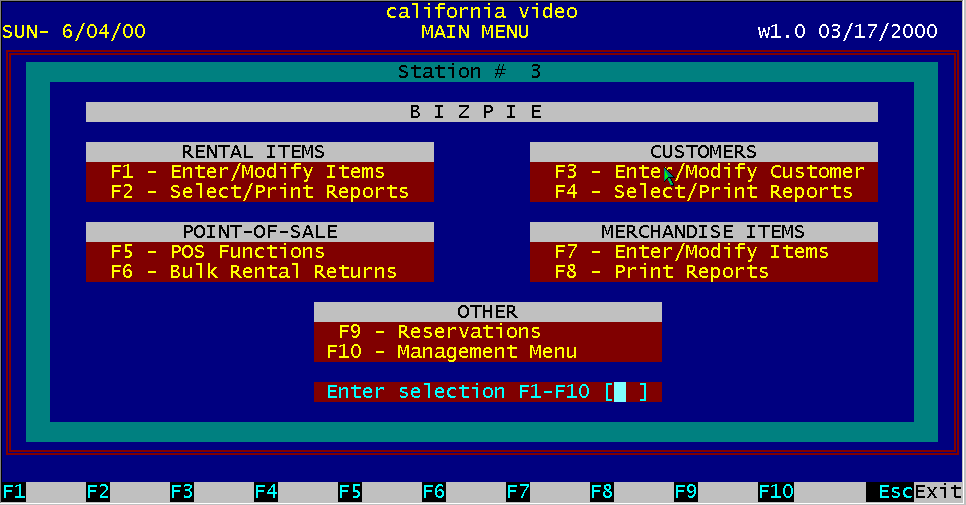
|
|
|||||||||||||||||||||||||
Figure 14.1 Main Menu Report Selections
BizPie has powerful report printing capabilities. There are almost an unlimited number of reports that can be printed. There are basically two ways of producing reports. The first is with predefined reports provided with the system. Second is your own reports, using the report writing capabilities of BizPie. The first method of printing reports provides you with instantly available set of common reports. You can select from any of the menu choices available, and have a report print within seconds. The second method of printing reports provides you with the ultimate in flexibility. You decide what fields you want to print and which items within these fields are to be selected to print. Each major section has its own report printing section. To select any of the report printing menu options, press F2 for "Rental Items", press F4 for "Customer" and press F8 for "Merchandise".
Figure 14.2 Rental Item Reports Main Menu
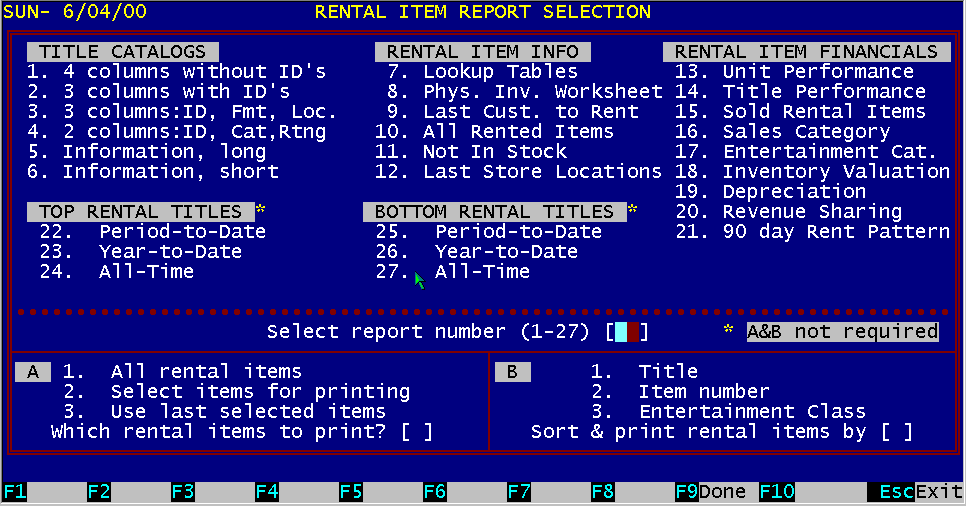
There are two ways of generating reports. The first is to use the preprogrammed reports already in the system and the second is to use the powerful report selection capabilities of BizPie. The report selection capabilities allow you to extract any data that is stored in the system. You select the range of parameters to print the report by the following pages will describe how to use these capabilities.
Figure 14.3 PreProgrammed Reports
BizPie can print any of the reports in the "Rental Item Report Selection" menu for all the rental items in your inventory if you do not want to extract any particular range of rental items. The first is where you select the type of report to print by entering: Select report number [1] to print the "Title Catalog" report. Then you select to print "All rental items" by entering: Which rental items to print? [1] Then you select to print the report sorted by either title or tape ID number: Sort and print rental items by [1] The above combination will produce a report of all the items in the rental inventory, listed alphabetically by title. To start printing the report, press function key F9. While the report is printing, you can pause by pressing any key. You will be prompted to stop the report, or to continue printing.
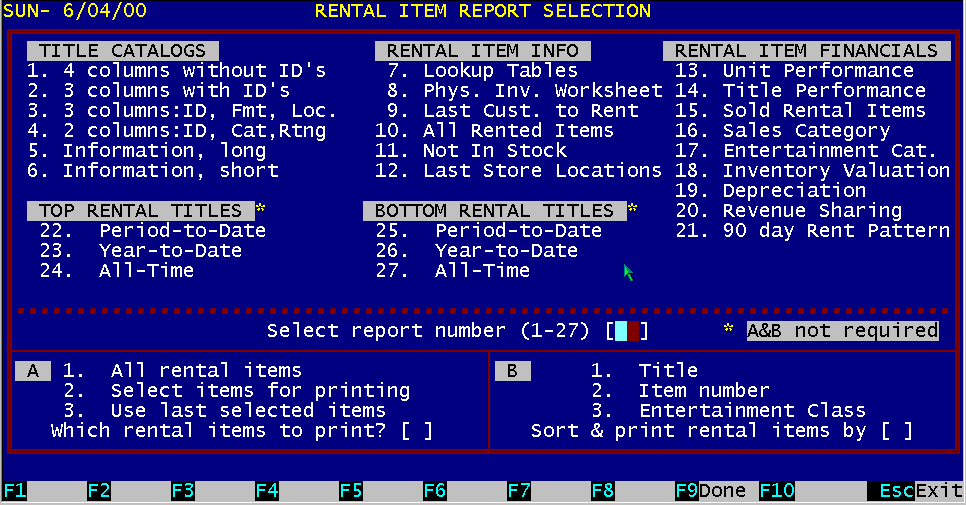
Figure 14.4 Selected Report Print
The second type of report is one of the most powerful type of reporting available anywhere. You select the format of the report you want to print as before, but now you can now select a range of parameters to bracket the information with before printing it. You select the report number as above: Select report number [ 1] and then select: Which rental items to print? [2] Then you select to print the report sorted by either title or tape ID number: Sort and print rental items by [1]
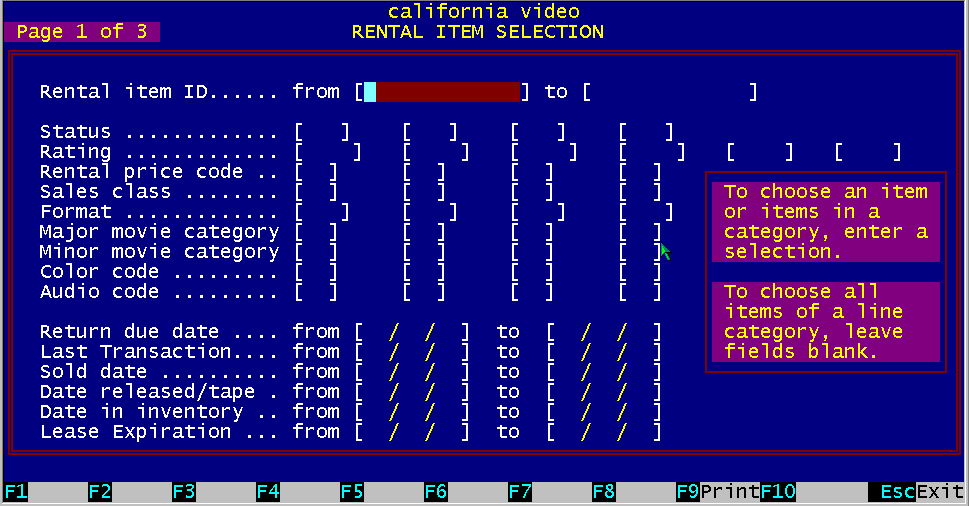
Figure 14.5 Rental Item Report Selection, Page 1 of 3
These individual items can be used to narrow the range of selection from the rental item inventory. The selected items that match your criteria will be the only items to print. To continue, press Function Key F9. You will then be presented with the "Rental Item Selection" screen page 1 of 3. To select the ranges of choices, just enter the information into the appropriate fields. Three pages are available with all of the fields contained in a rental item record. You can enter information into any of these fields to bracket and narrow down the range of records to be selected from the rental item file. Continue selecting additional data from the second and third pages below by pressing the Page Down key. When you are satisfied that these are the items within each rental item record to select, press Function key F9 to start the selection process. When the selection process is complete, the report will print only those records that matched all of the selected items you have chosen. From the example above, the selection was made to list only tapes that are:
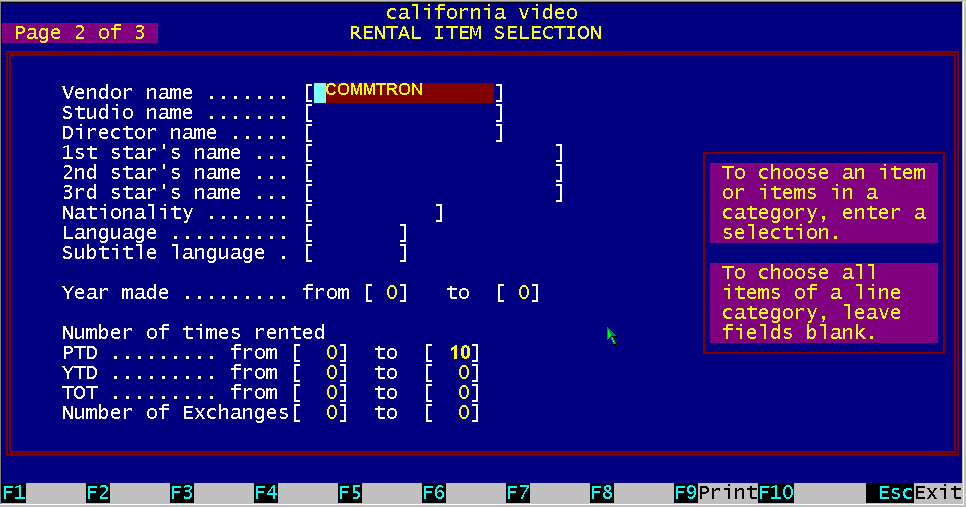
Figure 14.6 Rental Item Report Selection, Page 2 of 3
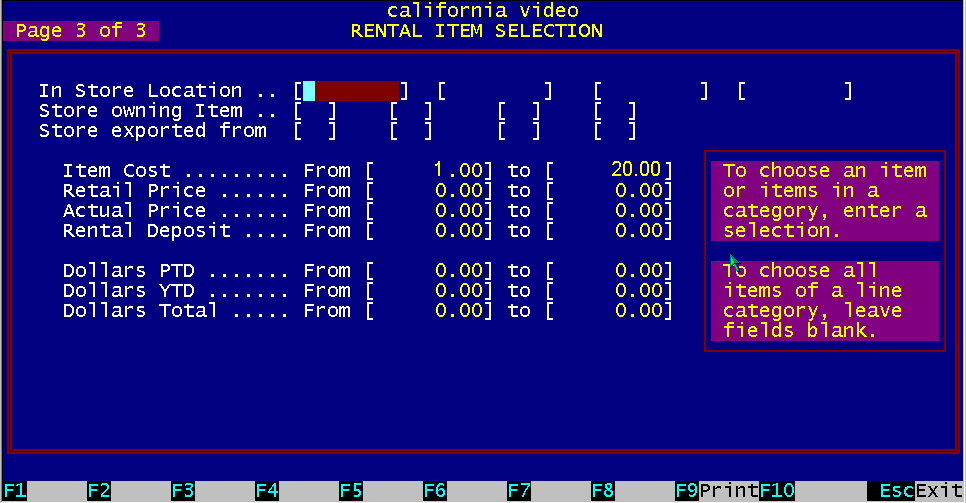
Figure 14.7 Rental Item Report Selection, Page 3 of 3
After the report scans all the rental items in the file, it selected and printed only items that matched the above criteria.
Therefore the only items that were printed are the ones that were rented (RNT Status), VHS format, whose Major Movie Category is Comedy, was purchased from Commtron, rented between 1 to 10
times and cost between $1.00 and $20.00. With this type of reporting, you can construct any conceivable type of report. By not limiting your
choices from a predefined set of reports, the possibilities are almost unlimited.
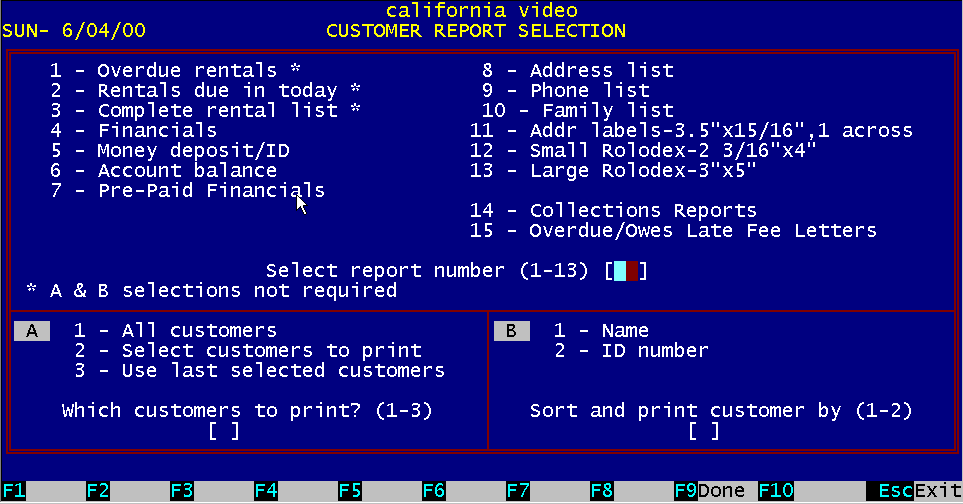
Figure 14.8 Customer Reports Menu
To print reports for "Customers", select main menu option #4 by pressing Function key F4. You will see the reports selection screen.
There are two ways of generating reports. The first is to use the preprogrammed reports already in the system and the second is to use the powerful report selection capabilities of BizPie. The report selection capabilities allow you to extract any data that is stored in the system. You select the range of parameters to print the report by the following pages will describe how to use these capabilities.
Figure 14.9 Customer Reports Menu
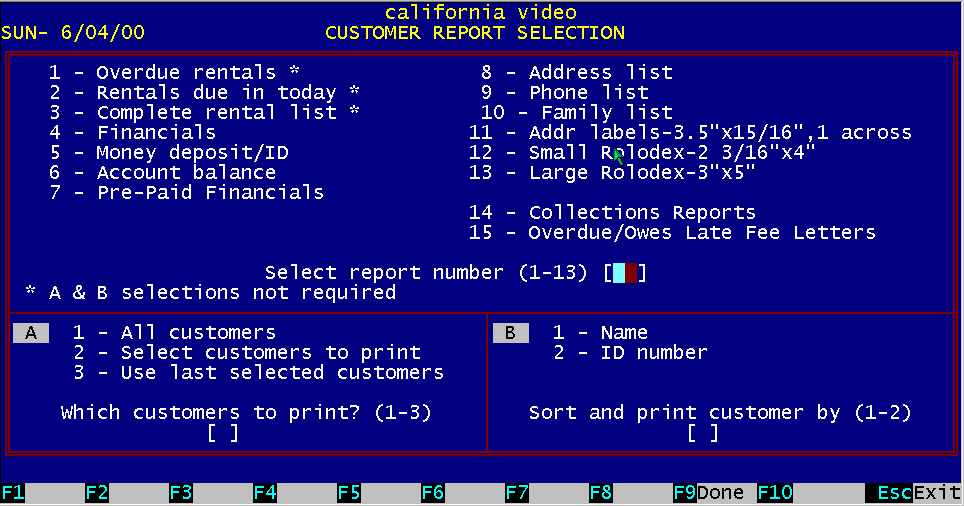
BizPie can print any of the reports in the "Customer Report Selection" menu for all the customers in your file, if you do not want to extract any particular range of customers. There are two basic types of customer reports. The first is where you select the type of report to print by entering: Select report number [4] to print the "Financials" report. Then you select to print "All customers" by entering: Which customers to print? [1] Then you select to print the report sorted by either customer name or customer ID number: Sort and print customers by [1] The above combination will produce a report of all the customers in the file whom have rental items out that are overdue as of now, listed alphabetically by name. To start printing the report, press MIFunction key F9. You may pause printing the report by pressing any key. You will be prompted to stop the report, or to continue printing.
The second type of report is one of the most powerful type of reporting available anywhere. You select the format of the report you want to print as before, but now you can now select a range of parameters to bracket the information with before printing it.
Figure 14.10 Customer Reports Menu
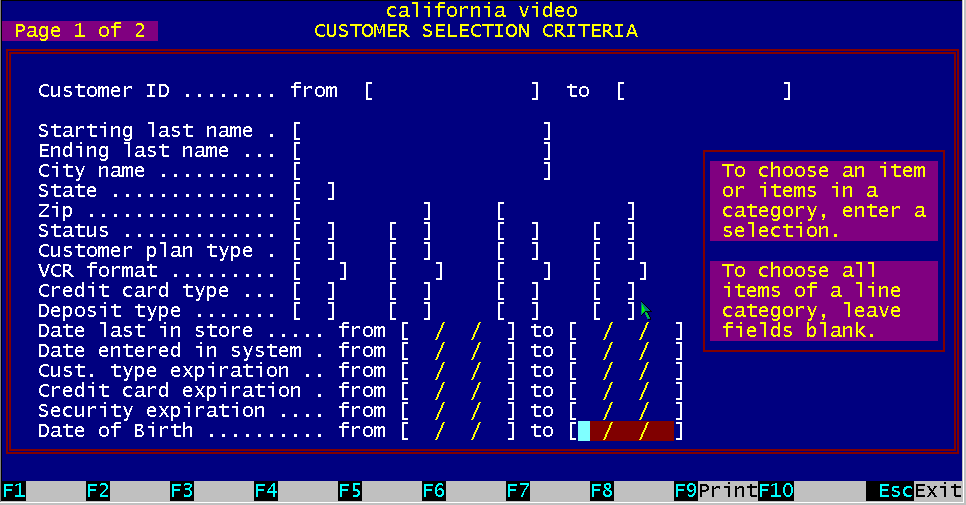
You select the report number as above: Select report number [4] and then select: Which customers to print? [2] Then you select to print the report sorted by either customer name or customer ID: Sort and print customers by [1] These individual items can be used to narrow the range of selection from the customer file. The selected items that match your criteria will be the only items to print. To select the ranges of choices, just enter the information into the appropriate fields.
Figure 14.11 Customer Report Selection, Page 1 of 2
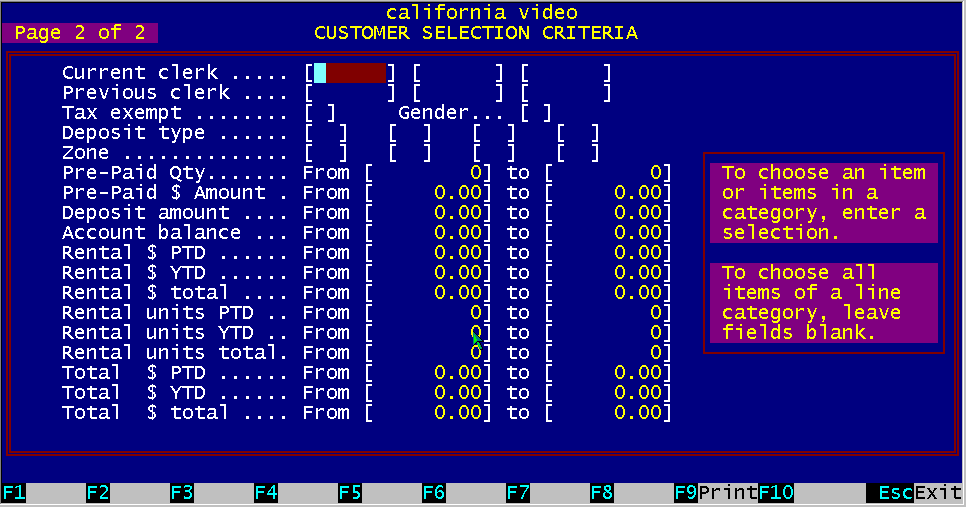
Two pages are available with all of the fields contained in a customer record. You can enter information into any of these fields to bracket and narrow down the range of records to be selected from the customer file. Continue selecting additional parameters from the second page below. When you are satisfied that these are the items within each customer record to select, press function key F9 to start the selection process. When the selection process is complete, the report will print only those records that matched all of the selected items you have chosen. From the example above, the selection was made to list only customers that are: OK status LT lifetime members have VHS machines have not been in the store since 4/30/87 owe you money After the system scans the customer file, it selected and printed only customers that matched the above criteria.
Figure 14.12 Customer Report Selection, Page 2 of 2
With this type of reporting, you can construct any conceivable type of report. By not limiting your choices from a predefined set of reports, the possibilities are almost unlimited.
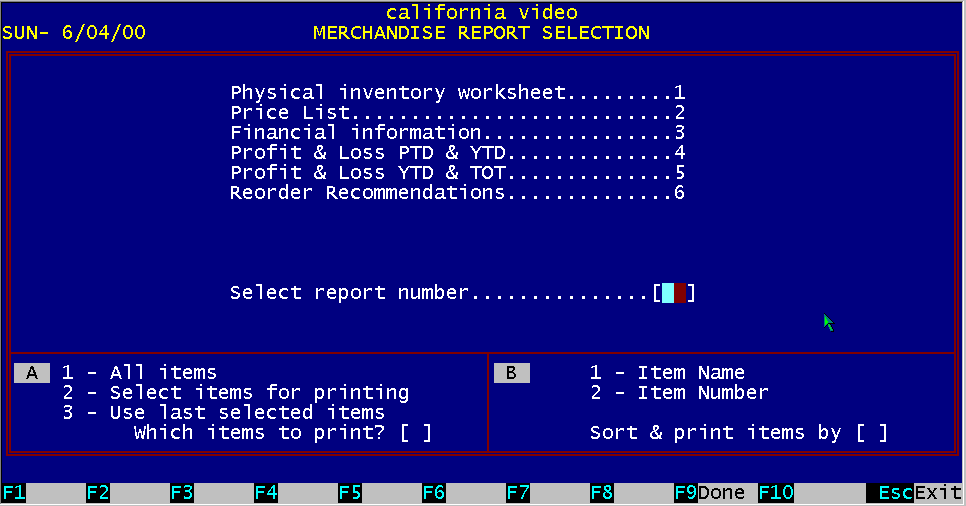
Figure 14.13 Merchandise Report Menu
To print reports for "Merchandise Items", select Main Menu #8 by pressing Function key F8. You will
see the reports selection screen. The merchandise report section does not have the selection capabilities of the rental item and customer section.
You can select to print the merchandise reports sorted either by description or by item number.
14.4.1 Physical Inventory Worksheet This report will print a worksheet to be used when you perform a physical inventory of your merchandise items. It lists each item in the inventory on a separate line. This allows you to check off the status of each item on the store and compare it with what is actually in the computer.
This report will print a price list of all items in the merchandise inventory.
14.4.3 Merchandise Financial Information This report will print the cost, sale price and profits made on each item in your merchandise inventory.
14.4.4 Reorder Recommendations This report will print information in items that are at or below the reorder point you have setup for each item. |
|||||||||||||||||||||||||
|
|||||||||||||||||||||||||
|
|
|||||||||||||||||||||||||
|
|||||||||||||||||||||||||
| [BizPie] [About Us] [Sales Information] [Service] [What's New] [SiteMap] | |||||||||||||||||||||||||
Please contact our Webmaster with questions or comments. |
|||||||||||||||||||||||||